This article provides a step-by-step example of basic DrufelCNC setup.
1. Open DrufelCNC.
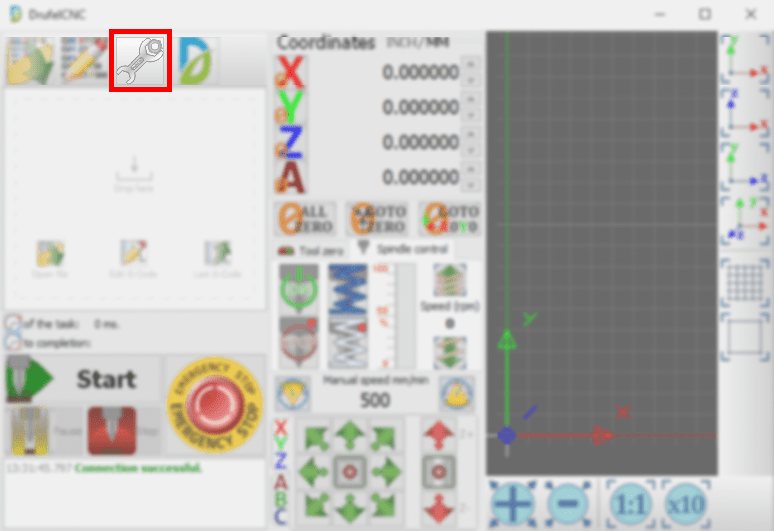
2. Click on the “Settings” button in the upper right corner.
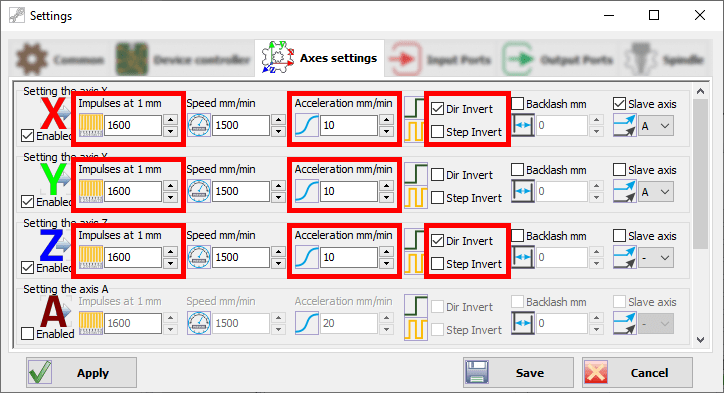
3. After clicking on the button, a window will open in front of you. Go to the “Axes setting” tab. It is necessary to set 1600 pulses per 1 mm for the axes you are using (in our case, 3 axes - X, Y, Z).
The number of pulses per mm must be set according to the specifications of your machine.
Set the acceleration to 10 mm per minute for the X, Y, Z axes.
Enable Dir Invert only for those axes for which it is necessary. In our case, you need to enable Dir Invert for the X and Z axes.
4. Then go to the “Input Ports” tab. Set port values and inversion.
Remember that the input port numbers are set according to the physical connections of buttons and limit switches to your machine.
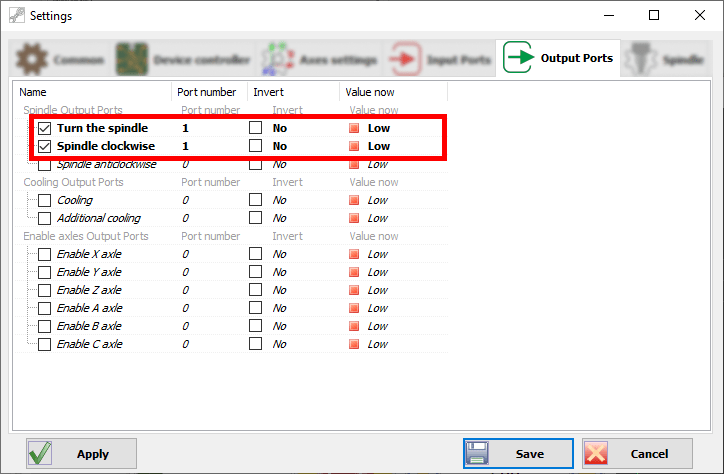
5. Then go to the “Output Ports” tab. Set the port values to enable the spindle.
Remember that the output port numbers are set according to the physical connection to the CNC controller.
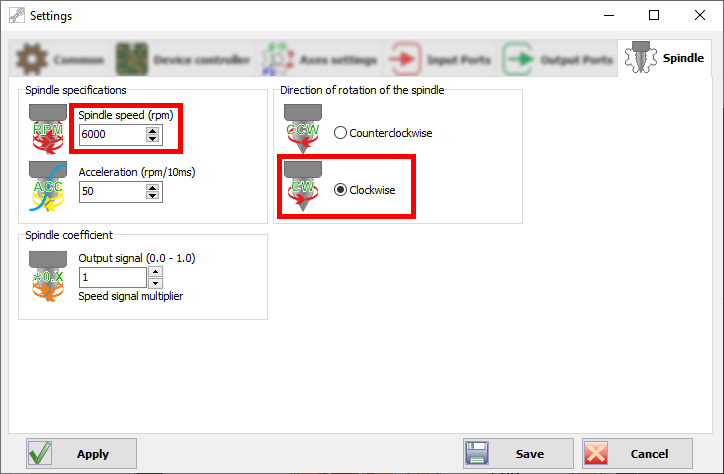
6. Next, go to the “Spindle” tab. Set the spindle speed values and activate Clockwise.
Remember to set the spindle speed according to the specifications of your spindle and inverter.